This has to be my favourite session of the year which was held with Nick, we created typography out of bread which was very interesting and allowed me to unleash my creativity. We were set the task of creating the entire alphabet out of bread but unfortunately for mine and joe's case, we over complicated our strategy which meant that we were only able to do a few different letters with out bread. Me and Joe tried to create something which was layered and purely original, as opposed to the similarities between everyone else's work.
Wednesday, 18 April 2018
Tuesday, 3 April 2018
Roll Up Effect
During todays workshop with Sara we learnt how to use a roll up effect on After Effects in order to animate images which we had previously created before the session. This effect was something which we had been building up to for a number of weeks whilst learning other effects as well. This effect was one which I found highly interesting and useful to learn how to use.
So firstly I began by choosing an image to trace which would create the basis for my design, this therefore meant that I had to select various different parts of the image to go on different layers, this meant that different parts of the image would move at different times therefore making it animated
Initial Image:
Castle Animation from Jessica Mountford on Vimeo.
So firstly I began by choosing an image to trace which would create the basis for my design, this therefore meant that I had to select various different parts of the image to go on different layers, this meant that different parts of the image would move at different times therefore making it animated
Initial Image:
Developed Image:
So this particular image is very basic, so then i moved on to create it all in monotone colours in order to make the image slightly simpler and more aesthetically pleasing.
I also had to change the size of the original canvas so that it was suited to HD standards and that it would be versatile for when I published it.
We then moved on to importing everything into After Effects, this meant that i had to make sure that everything was on a separate layer when importing it. This would allow me later on to separate everything out so that it all animated at different points.
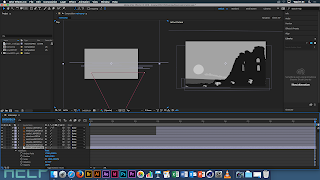
We also started off the animation by using the camera tool to get the image mainly off screen, this would also enable a sort of 3D effect to happen. We set up the camera using the settings below to ensure that the optimum quality was achieved throughout the movements we created.
On the screenshot above, I have demonstrated how the different layers are layered over one another from a 3D aspect, this therefore demonstrating which pieces are to roll up in which order, by doing this it made it much easier for me to visualise what was going to happen before even animating the piece. Once the animation was ready to be animated, I added a textured background and began to apply the roll up effects to the pieces.
Infographics Using a Simple Transition Slide
For this workshop we were told not to do any prep work, and all of the work needed to be done during the session. We were given small slips of paper with information on them and we needed to animate them within 10 seconds however we wanted.
I started off by creating four simple characters on Illustrator, this didn't take long as it was something which I have previously created and I developed it.
Infographics Using a Simple Transition Slide from Jessica Mountford on Vimeo.
I started off by creating four simple characters on Illustrator, this didn't take long as it was something which I have previously created and I developed it.
These characters would be the basis for my piece, the words that I got given, read as : "The first student representative council (now the student union) met on 30th November 1927" this demonstrates that the information provided was short and concise therefore making it much easier to animate.
I then moved on to create a simple video where the information was conveyed quickly and simply. I also added a transition slide where a rectangle just wipes over the piece in order to get it to link to the other pieces which we created.
Infographics Using a Simple Transition Slide from Jessica Mountford on Vimeo.
Thursday, 15 February 2018
Self Publishing - Manipulating Typefaces
Considering all of the workshops we have, these are by far my favourites, due to the practicalities and the different, spontaneous things which we get to create. During this session we were given three different type faces to work with, we had to pick certain parts out of letters we liked to create a stencil, this would then be printed onto an A2 sheet in an interesting way, the images below demonstrate both the process and the final outcomes.
Adobe Premier - Slideshows
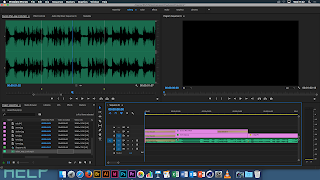
During this session with Jay we were introduced to Adobe Premier, a piece of software which is perfect for making show reels. This session achieved something very similar to what we did with Sara at the beginning of the year. It was simply making slideshows which transitioned professionally, we also looked at basic text effects that we could use in order to illustrate the different images and videos which we included within the show.
Show Reel example using Adobe Premier from Jessica Mountford on Vimeo.
br />
Slideshow Example, using Adobe Premier Pro from Jessica Mountford on Vimeo.
Show Reel example using Adobe Premier from Jessica Mountford on Vimeo.
br />
Slideshow Example, using Adobe Premier Pro from Jessica Mountford on Vimeo.
After Effects - Use of Effects, Lighting and Cameras
During this session with Sara we were taught mainly about the use of Z Space, which makes the animation almost 3D, it allows the user to start using the extra space which is available. It is a dimension of white nothingness, where neither time, nor space exist. By using this is makes animation a whole lot more versatile, it was something which we touched upon last year which is incredibly useful in order to make a high quality animation.
For this particular session we were asked to create media to use previous to the session. I wanted to make something which represented where I was from, I used some of my own photography to trace and then create an animation out of.
Castle Animation from Jessica Mountford on Vimeo.
For this particular session we were asked to create media to use previous to the session. I wanted to make something which represented where I was from, I used some of my own photography to trace and then create an animation out of.
This was the original image which I used, it was taken at Mow Cop Castle, which is in Cheshire. It is the highest point in the area and looks over the Staffordshire and Cheshire plane. This image was taken on a summers day last year, in which I took a number of images and this was a particular favourite of mine.
This was the image which I created from this, and each section is on a completely different layer so that I would be able to use the layers in order to create the animation. When moving the piece into After Effects I also changed the colours to make them completely monochrome, this gave the piece a more vintage feel and made it seem more traditional. I also added textures and lighting, along with brief information about the location.
Castle Animation from Jessica Mountford on Vimeo.
Friday, 5 January 2018
After Effects - Working with Hand Drawn Images
This has to be one of my favourite sessions which sara has ever done with us. Previous to the lesson we were told we needed a minimum of three drawings, which were all in the exact same place on each separate page, this would make it much easier for us when we used them within after effects. Previous to this session I knew that I wanted to link it to my Imminent Self studio brief, therefore I created several drawings of a lip moving, which included scars which were similar to mine.
Working with Hand Drawn images from Jessica Mountford on Vimeo.
All of these images were then scanned onto the computer to ensure the quality was the best. They were all imported into Illustrator so that they could be edited and because I drew mine using pencil I needed to change the white and black balance so that they stood out a lot more.
These images were then imported into after effects. They were sequenced together and a textured background was added. I found that mine moved much too fast for my liking and therefore I changed the composition speed to make it seem more realistic. This was a fairly simple technique which created an interesting piece. I also inverted the colours, along with adding a wiggle effect to my text to make it seem more interactive for the audience.
For my final piece, I added two more different compositions, which included text and movement of the image sequence. I was incredibly happy with the final outcome of my piece and I will look further into these techniques when applying it to my studio project.
Subscribe to:
Posts (Atom)


