During todays workshop with Sara we learnt how to use a roll up effect on After Effects in order to animate images which we had previously created before the session. This effect was something which we had been building up to for a number of weeks whilst learning other effects as well. This effect was one which I found highly interesting and useful to learn how to use.
So firstly I began by choosing an image to trace which would create the basis for my design, this therefore meant that I had to select various different parts of the image to go on different layers, this meant that different parts of the image would move at different times therefore making it animated
Initial Image:
Developed Image:
So this particular image is very basic, so then i moved on to create it all in monotone colours in order to make the image slightly simpler and more aesthetically pleasing.
I also had to change the size of the original canvas so that it was suited to HD standards and that it would be versatile for when I published it.
We then moved on to importing everything into After Effects, this meant that i had to make sure that everything was on a separate layer when importing it. This would allow me later on to separate everything out so that it all animated at different points.
We also started off the animation by using the camera tool to get the image mainly off screen, this would also enable a sort of 3D effect to happen. We set up the camera using the settings below to ensure that the optimum quality was achieved throughout the movements we created.
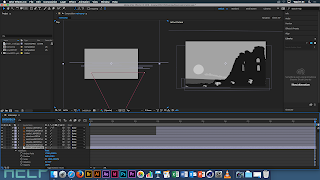
On the screenshot above, I have demonstrated how the different layers are layered over one another from a 3D aspect, this therefore demonstrating which pieces are to roll up in which order, by doing this it made it much easier for me to visualise what was going to happen before even animating the piece. Once the animation was ready to be animated, I added a textured background and began to apply the roll up effects to the pieces.
Castle Animation from
Jessica Mountford on
Vimeo.


